
iPad 9 PWNDFU on Raspberry Pi Pico 2 — Tested UF2, Wiring and Flashing Guide
Sharing the community USBLiter8 iPad 9 firmware we successfully tested on a standard Raspberry Pi Pico 2 (RP2350), including wiring and installation instructions.
Tested setup
- Board: Raspberry Pi Pico 2.
- Device: iPad 9 Wi-Fi — iPad12,1 / J181AP.
- Firmware:
usbliter8.waveshare_rp2350_usb_a_iPad9.uf2. - Confirmed result:
PWND:[usbliter8].
Although the filename refers to Waveshare, this exact, unchanged UF2 successfully completed our PWNDFU test on Pico 2. This result applies to the tested board and firmware. The original RP2040 Pico is a different target.
Installing the firmware
- Keep the iPad and GPIO wiring disconnected for the initial flash.
- Hold BOOTSEL on the Pico 2 while connecting its Micro-USB port to your PC.
- Release BOOTSEL when the RP2350 drive appears.
- Copy
usbliter8.waveshare_rp2350_usb_a_iPad9.uf2onto that drive. - Wait for copying to finish. The drive disappears when the Pico reboots.
- Disconnect USB power before making the wiring connections.
Connecting the Lightning cable
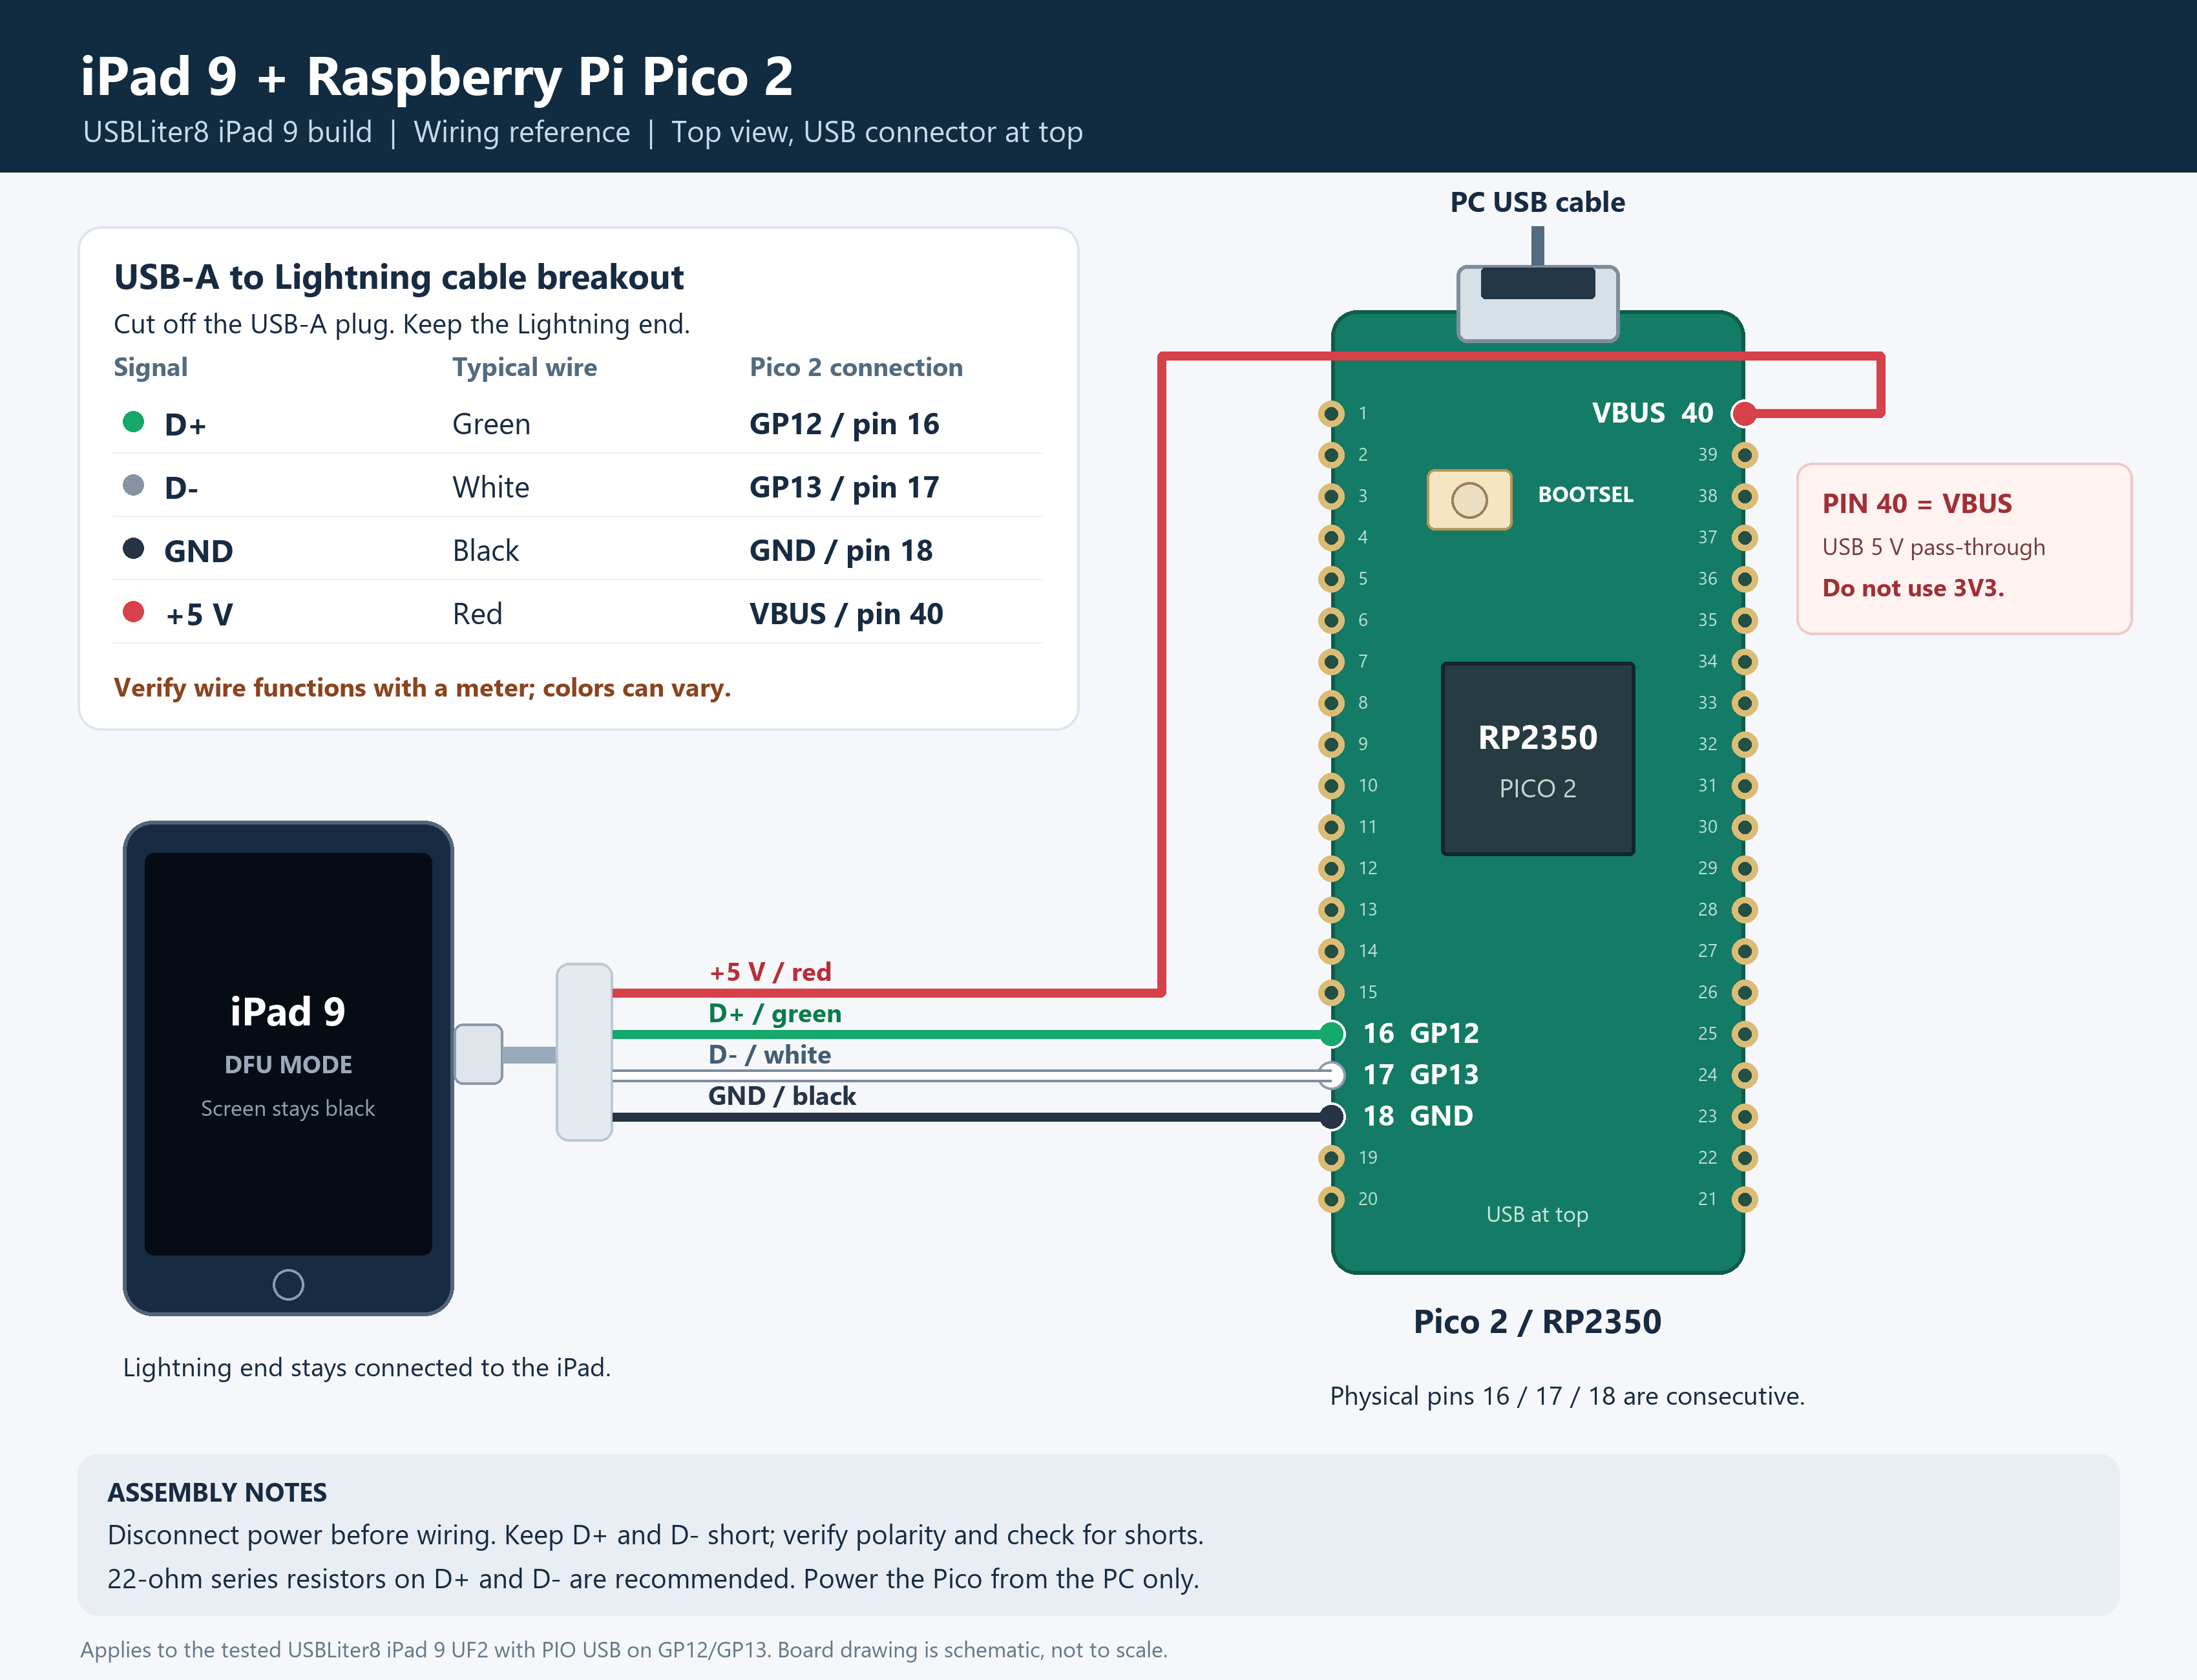
Use a USB-A to Lightning cable. Cut off the USB-A plug and retain the Lightning end.
View the Pico from the component side, with its Micro-USB connector at the top.
USB signalTypical wire colorPico connectionPhysical pinD+GreenGP1216D−WhiteGP1317GNDBlackGND18+5 VRedVBUS40Verify the conductors with a multimeter; colors can vary. Keep the data wires short and check for shorts before powering up.
One 22 Ω series resistor on each data line, near the Pico, is recommended. Our initial test worked with short direct connections, but cable reliability can vary.
Connect +5 V to VBUS pin 40. Do not connect it to 3V3 or a GPIO. Power the Pico from the PC only; this simple breakout has no separate USB-host current-limit switch.
Entering DFU and testing
- Connect the iPad to a computer.
- Hold Top/Power + Home together for approximately eight seconds.
- Release Top/Power and continue holding Home for approximately ten seconds, until DFU is detected.
- The screen must remain completely black. A cable/computer graphic indicates Recovery mode.
- Confirm Apple DFU detection, normally VID 05AC / PID 1227.
- Move the iPad to the wired Lightning connection. Re-enter DFU if necessary.
- Power or restart the Pico and check the USBLiter8 output. Do not hold BOOTSEL during normal operation.
Our test confirmed:
Device: iPad 9 Wi-Fi (iPad12,1)CPID: 8030BDID: 18PWND:[usbliter8]The onboard LED is not a reliable success indicator for this Waveshare-targeted build on Pico 2.
Credits
Community USBLiter8 firmware; this guide documents our wiring and test results. The firmware’s boot banner credits the iPad 9 modification to CDSQ.